Table of Contents
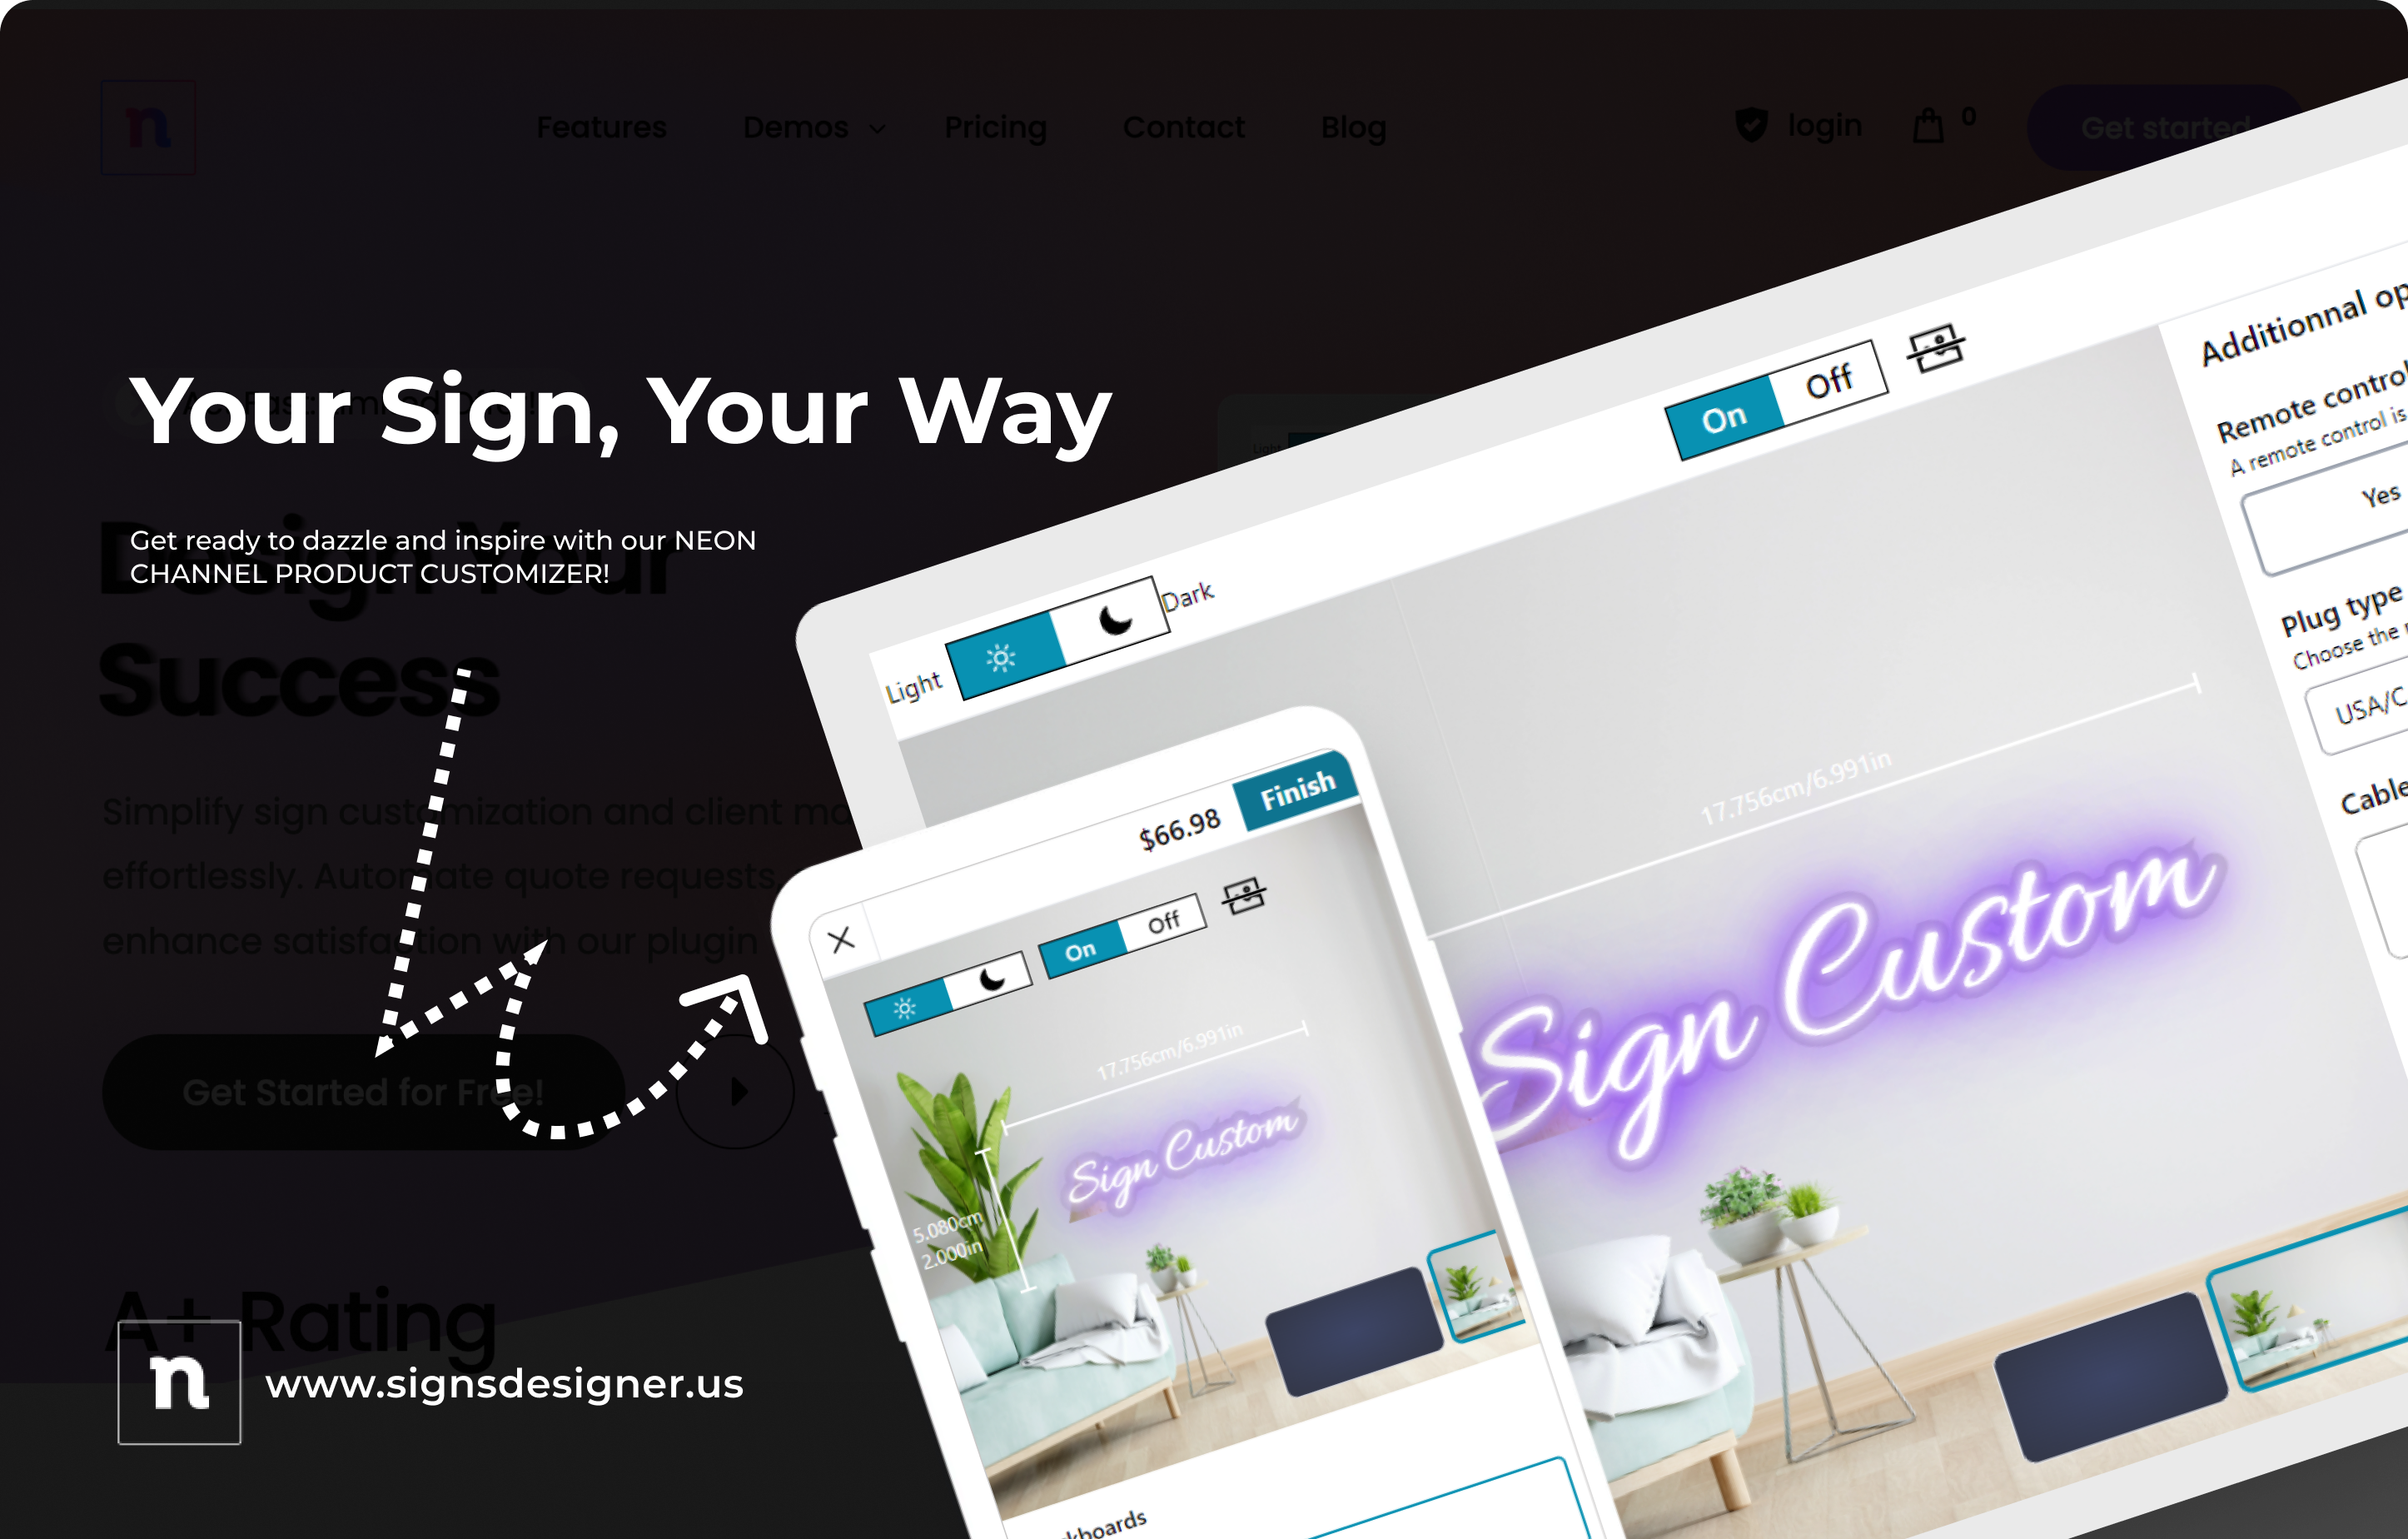
How to create my custom neon configurable product ?
What is a Configuration?
A configuration is a set of parameters used to create a configurable product. In order to create our customizable neon sign product, we first need to create a configuration that will contain the different components and their options, and then assign this configuration to an existing product to turn it into a configurable product.
To create our custom neon configuration, we have permanent components like, the text font family, the color and dimensions, the scene to simulate its decoration. We also have the additional options module that allows us to define several other options that impact the price of the design but do not affect the preview, such as the choice of support etc…
Step
- To create a new configuration, click on NPD > New configuration.
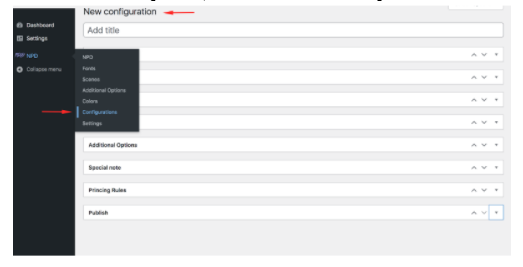
You can enter the title of your configuration and define other options for the different components.
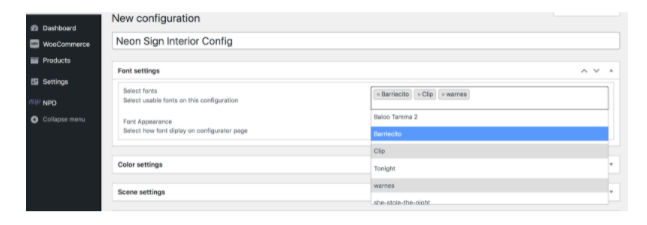
2. The first component is the font family of your sign. The fonts must be added beforehand from the NPD > Fonts menu. You will only choose here the fonts you want to make available for this configuration.
You can also define the display appearance of the fonts on the configurator by choosing between a Select or Text.
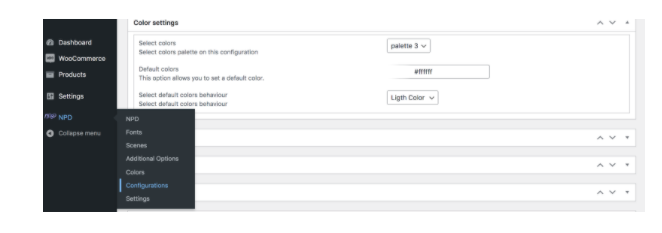
3. Here, you will have to choose among your color palettes previously defined in the NPD > Colors menu.
You can define a default color, which you can use as the color of the backlight, or fixed color of the text and allow the change of the light color by the user or use the same color for the text and the light.
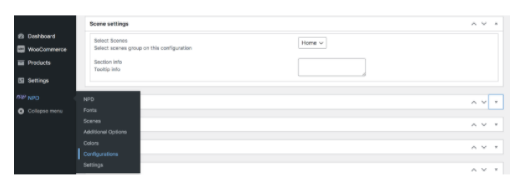
4. In this section you will also have to choose a group of scenes, among those created in the NPD > Scenes menu. These images will be available on the configurator to allow your customers to choose the setting for their design. The tooltip field allows you to display a description for this section on the configurator.
5. For the Size section, you have to define the dimensions and their additional price. Your customers will be able to choose among the dimensions you have defined and the price will be updated automatically according to them.
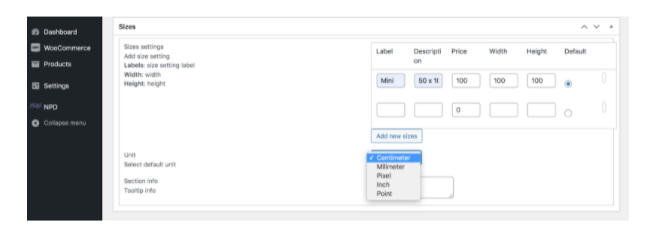
By clicking on the add new size button a new dimension line composed of Label (name of the dimension), Description (description of the dimension, displayed in tooltip), Price (additional price of the dimension), Width (width of the dimension), Height (height of the dimension) and Default (default dimension) appears to fill in the values of your dimensions
You can also set the default unit of measurement that you allow for this configuration.
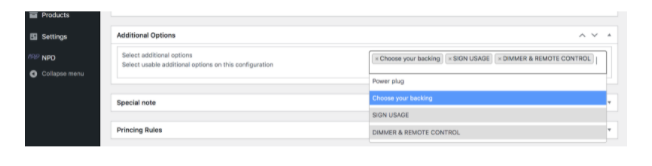
6. In the additional options section, you choose the different additional options that you have previously added in the NPD > Additional Options menu.
These options appear on the configurator and impact the price according to the choice of the options.
7. For the additional note section, it will be a matter of allowing or not a field on the configurator so that your customers can add an additional note to the configuration before placing the order.

8. In the Pricing rules section you define the pricing rules based on the number of characters in the text or based on the text size.
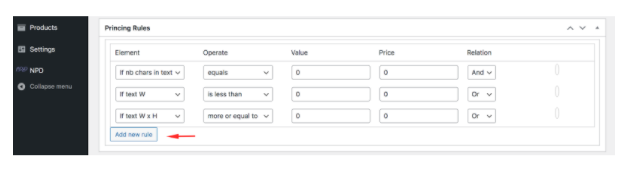
By clicking on the Add new rule button, you will see a new rule line composed of Element (the element on which the rule is going to be based), operator, the value that would be checked for the rule, the price to be applied and the relation with other rules.
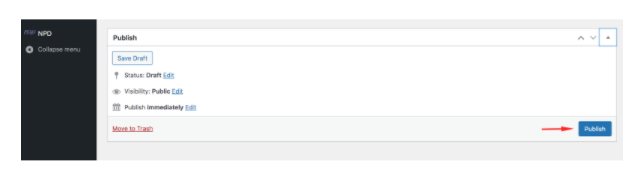
9. Finally in the Publish section, you can save your configuration.
The next step is to create a new WooCommerce product (or edit an existing one), to assign our configuration to.